THE ANCIENT INCREMENTS OF OVERLAND DISTANCE.
After the unwelcome incursion of Roman invaders into the highly organised society
of Druidic Great Britain, millenniums of accumulated knowledge came under brutal
assault, resulting in the loss of many cultural items or refined sciences. This
was particularly true after the coming of Romanised Christianity centuries later.
The full parcel of ancient measurements in the 6, 7, 8, 11 or PHI series was
severely reduced, with only some sexagesimal measurements or "11"
series distances surviving until modern times. The septimal and PHI based measurements,
like the reed and megalithic yard, fell into disuse and were forgotten. Thankfully,
they still repose in ancient structures and are fully retrievable.
Surviving distance measurements included the "11" series mile, furlong,
chain and to a lesser extent rod and link. The fathom was tampered with and
changed from 5.5 feet to 6…or from an "11" series linear measure
to a sexagesimal measure (two yards).
One of the great increments lost was the "league", which was known
to originally be "about 3-miles" for the English league (various distance
units ranging from 2.4 miles to 4.6 miles have been called "leagues"
throughout the ages...see Webster's Third New International Dictionary).
By ratio comparison to the other surviving "11" series distance measurements
it is quite obvious that the ancient league was 3.125 miles or 16500 feet.
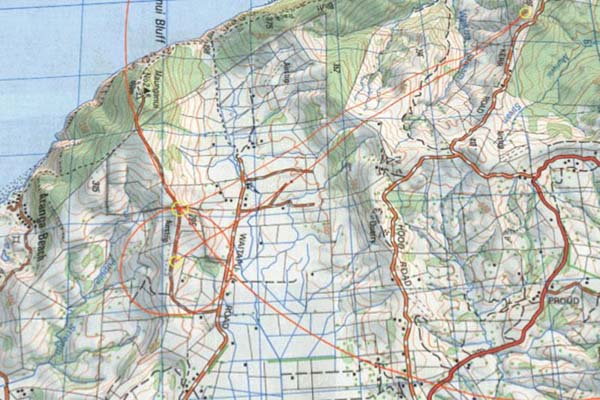
The 3.125-mile league is precisely marked in the overland terrain centred on
the Waitapu Valley.
Figure 9: On the elevated Telecom Road approach to the large tor mound on
Maunganui Bluff's ridge, one passes two solitary boulder cairn en route. The
larger cairn marks a PI relationship both in distance and angle to the tor mound
on the northern ridge of the valley, whereas the second, smaller cairn encountered
marks "11" series distances. It relates simultaneously to a boulder
cairn adjacent to the large butte of natural rock at the top of Puketapu Hill,
as well as to the nearby tor mound on Maunganui Bluff's ridge. A 16500 feet
radius circle, extending from Maunganui Bluff's ridge, traverses several positions
on Puketapu's SSW facing slope, as well as the summit. The final intended azimuth
angle code between these two locations will probably be 324-degrees, although
there is also a positive "hit" onto a marker at 324.7-degrees.
Although Maunganui Bluff's cairn marker resides exactly one league of 16500
feet (3.125-miles) "as the crow flies" from Puketapu Hill's summit,
it also lies exactly 3 furlongs (1980 feet) from a large boulder marker at the
edge of the southern ridge tor mound.
The selfsame boulder marker at the edge of Maunganui Bluff's tor mound sits exactly 15120 feet from the big natural rock butte on Puketapu Hill. This measurement is significant for several reasons:
The long arc of the 15120 feet radius, circle centred on the butte rock of Puketapu hill, almost perfectly sweeps the curved ridgeline of Maunganui Bluff, extending from east of the tor mound to the summit region above the seaward cliffs.
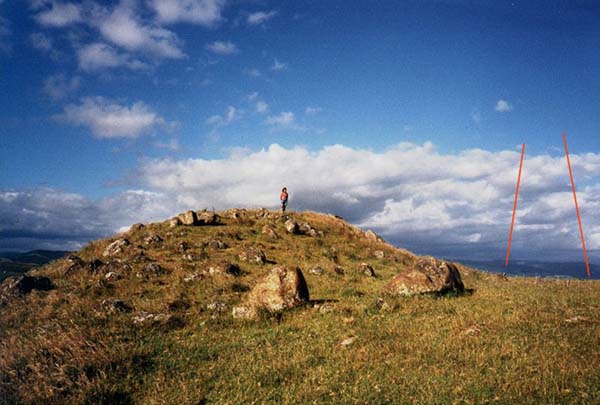
Figure 10: This is the largest known tor mound in the vicinity of Maunganui
Bluff and the Waitapu Valley. It was centrally important to many trig cairn
or standing stone markers scattered throughout the valley or on the elevated
ridges and plateaus, as it represented an interim position for their more distant
alignments. Two red lines indicate the approximate positions of important associated
boulder markers, which relate to the "3" furlongs or 15120 feet distance
circles previously mentioned. Other large marker boulders, visible for a considerable
distance, can be seen in the foreground.
The general appearance of the structure would suggest that the site has been
partially wrecked. This fate is fairly common for New Zealand standing stone
circles, where formerly erect, sharks-fin shaped stones now, invariably, lie
on their sides. Even the very wide based, squat and stable hubstones of the
Waitapu standing stone circle have been tipped north. Thankfully, the sites
are relatively easy to assess, as the stones have, for the most part, remained
on line and true to their former standing positions. As a result many sites
are in a restorable condition.
Although the tor mound had individual boulders marking significant position
on its top or around its perimeter, it was predominently a stone ring "bulls-eye"
on the steep sloping front of the tor that was the main alignment target from
outlying stations.
In an attempt to find out why the tor was built and how it was used, let's go
to a series of 5 large hubtone boulder sites across the Waitapu valley, each
with their own associated array of alignment markers. From those 5 observatories
the tor mound was used to align onto mountains to the south. Here's an example:
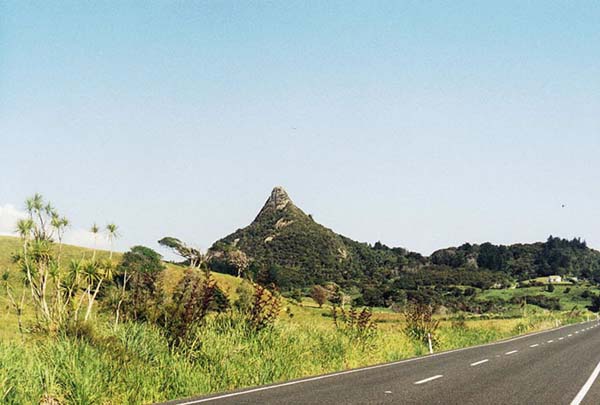
Figure 11: This is Toka Toka mountain, some 50 miles south of Maunganui Bluff. Waitaha legend tells us that the pinnacle was partially shaped in antiquity, such that at the time of the summer solstice, and due to a combination of lighting and shadow play, the face of an old man with a beard appears quite prominently. The face is apparent in this picture taken at the height of summer. The small mountain sits beside a waterway leading to the open sea and, in keeping with what happens at some other New Zealand harbour entryways like Whangape, the old man would represent Tangaroa, God of the sea and ocean voyages.
Let's now consider how some of the Waitapu Valley alignments, many miles north, orientate onto Toka Toka, using the southern ridge tor mound as an interim, in between alignment position:
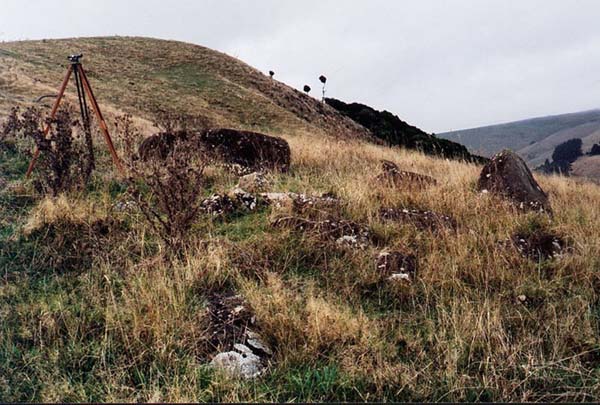
Figure 12: One of five carefully situated observatories in a row, each with large central hubstones. These sites are high up on the northern side of the valley and reside at coded distances from the tor mound on Maunganui Bluff. For example, the hubstone of the most central site amongst the 5 was, seemingly, intended to be 7087.5 feet from the epicentre of the tor mound. This is a special lunar code and the Khafre Pyramid of Egypt was 708.75 feet in length. Half of 708.75 is 354.375 and this value, in days, is the length of the lunar year.
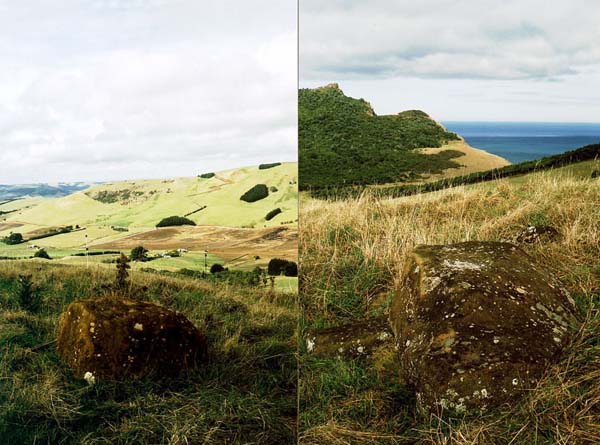
Figure 13: The general panorama from the elevated observatory sites on the
northern side of the valley, viewing southeast (left photo) and southwest (right
photo). Each photo shows a large hubstone in the foreground associated with
that particular site from which the photo was taken.
The left picture shows the main orientation of alignments from these 5 sites.
The right picture shows where the sea horizon conjuncts with the land above
a specially excavated and formed "benchmark cleft" and this relationship
was an important means of determining elevations across country…a point
which shall be discussed in more depth as we proceed. The benchmark cleft in
the frontal sea cliff is visible from these 5 sites.
Let's concentrate on how the 5 sites aligned onto mountains like Toka Toka and Maungaraho to the southeast, using the tor mound on Maunganui Bluff as "sight over" target.
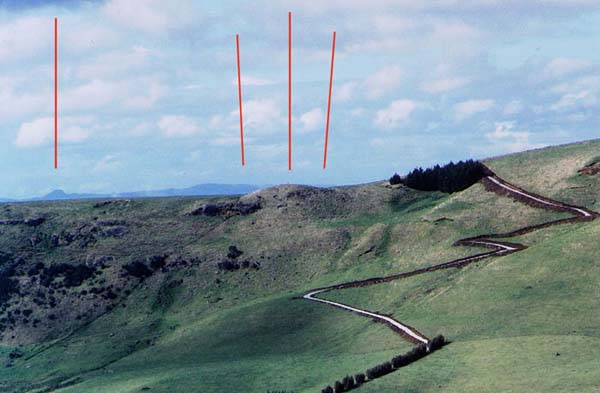
Figure 14: The elevation of the 5 observatories places them in excellent positions to use the tor mound and adjacent "plane table" ridge to the east for sightings onto mountains to the southeast. This photo was taken from the central or third observatory and shows Toka Toka rising like a pimple in the very centre of the Tor mound. This is what each observatory did:
1. From hubstone 1 furthest west. At this position the larger mountain range to the left of Toka Toka (Maugaraho) is perfectly silhouetted behind the tor mound.
2. From the 2nd observatory hubstone Toka Toka is precisely located on the right edge of the tor mound.
3. From the 3rd observatory hubstone Toka Toka is situated in the centre of the tor mound and rising just above the tor's crest.
4. From the 4th observatory Toka Toka is precisely located on the left edge of the tor mound.
5. From the 5th, slightly lower and most eastern observatory hubstone the target appears to be Maungaraho Mountain, the top of which is only just visible above the level (plane table) ridge east of the tor mound.
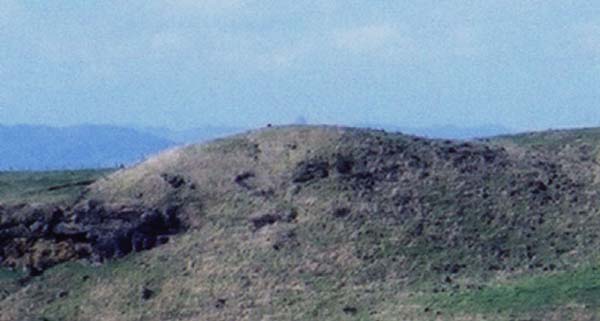
Figure 15: In this much magnified photo taken from the 3rd observatory
hubstone the sharp apex point of Toka Toka Mountain can be seen protruding (albeit
faintly) above the epicentre of the tor mound. A dark ring of purpose placed
stones lies on the front of the tor and this was the most targeted surveying
position for outlying markers.
This kind of activity is typical of what went on from marked trigs throughout the valley. Just as the tor mound edges were used to fix upon Toka Toka Mountain from two of the observatories, so was the summer solstice sunrise made to occur at the tor mound edges from two marked observation positions much lower down in the valley.
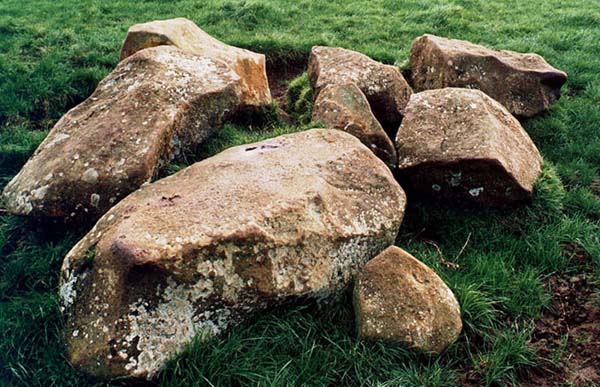
Figure 16: This cluster of boulders was once a small standing stone circle solar observatory, but in about 1987 the farmer shoved outlying boulders in onto one "immovable" central boulder. Thankfully, that position is still intact and can still function in its original capacity. So let's see what the original function of the central boulder was:
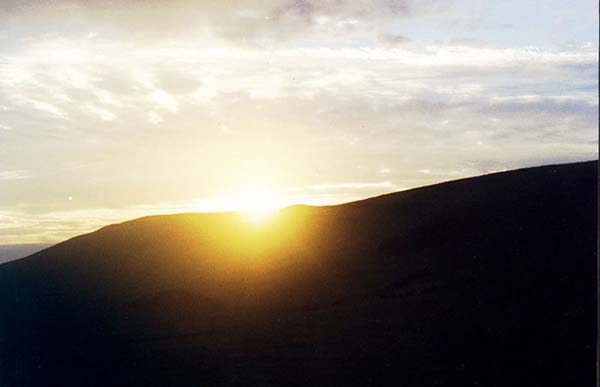
Figure 17: From the position where the central, immovable boulder has resided
since ancient astronomer/ surveyors carefully positioned it, the sun rises on
the left edge of the tor mound on the day of the summer solstice. Amongst the
boulders dragged to this position by a tractor in 1987 one assumes there would
have been a boulder that formerly marked the solstice sunrise in the epicentre
of the tor mound. Other boulders probably indicated solar events like the winter
solstice sunrise on the northeastern end of the Tutamoe Mountain Range.
Let's look at another observation position, which still functions partially after having its satellite boulders pushed inward toward the hubstone:
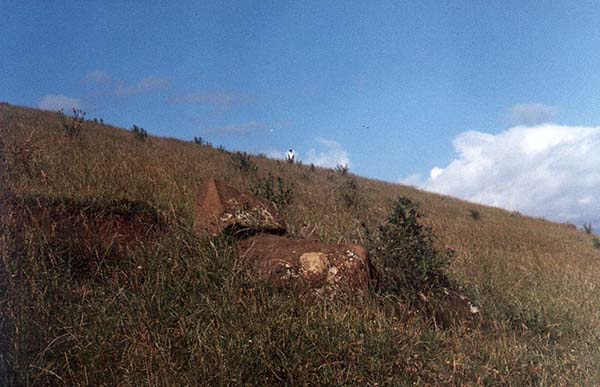
Figure 18: Clifford Martin stands at the observation station previously mentioned. These foreground boulders represent a smaller, downhill site from which to observe the summer solstice sunrise. The field in which these boulders reside is free of stone and the boulders are very conspicuous accordingly. It's quite apparent that they have been hauled to their positions to serve some purpose.
Here's what this solitary site does:
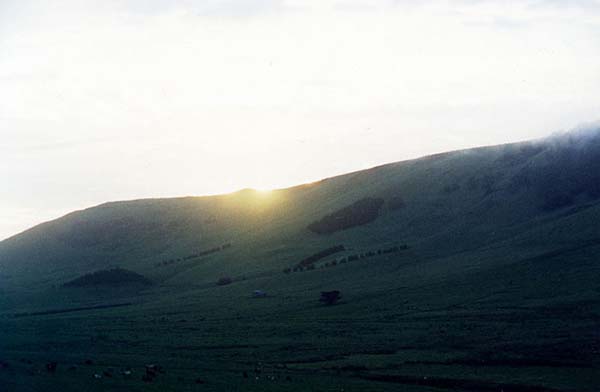
Figure 19: The summer solstice sunrise on the right edge of the tor mound, as seen from the lower observation station.
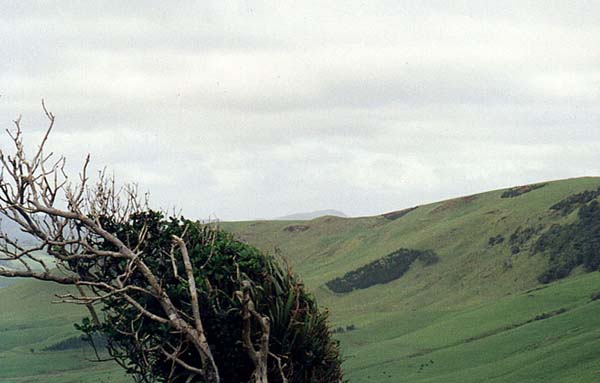
Figure 20: From a cairn marker on an elevated plateau above the Waitapu Observatory one looks toward the tor mound on Maunganui Bluff and immediately sees why the cairn marker was placed in that precise position directly beside the seaward cliff on a shaped and modified plateau. Silhouetted immediately behind the tor mound is a distant mountain. Yet another peak (slightly obscured in this photo) protrudes above the level ridgeline adjacent to and east of the tor. This ridge has many cairn and boulder markers extending down its length, which, like the tor itself, act as interim positions for alignments and coded distances from a variety of valley markers. A large round ring of stones on the lower front face of the tor mound sits on a perfect level to the trigs of this sea-cliff plateau.